
January 8, 2026
Tips for Creating the Perfect Wedding Seating Chart
Avoid the drama, keep photos beautiful, and make your guests feel right at home
Creating your wedding seating chart sounds simple — until you’re knee-deep in a color-coded spreadsheet, trying to remember which cousins don’t talk anymore and which table is closest to the dance floor.
As a wedding photographer, I’ve seen hundreds of seating plans in action — the good, the stressful, and the “why is Uncle Joe sitting right in front of the speaker?” kind of situations.
If you’re ready to avoid the chaos and create a seating plan that works for you, here are my top tips — including a few that will make your wedding experience and photos even better.
1. Seat Parents Close to the Head Table — and Assign VIP Seats
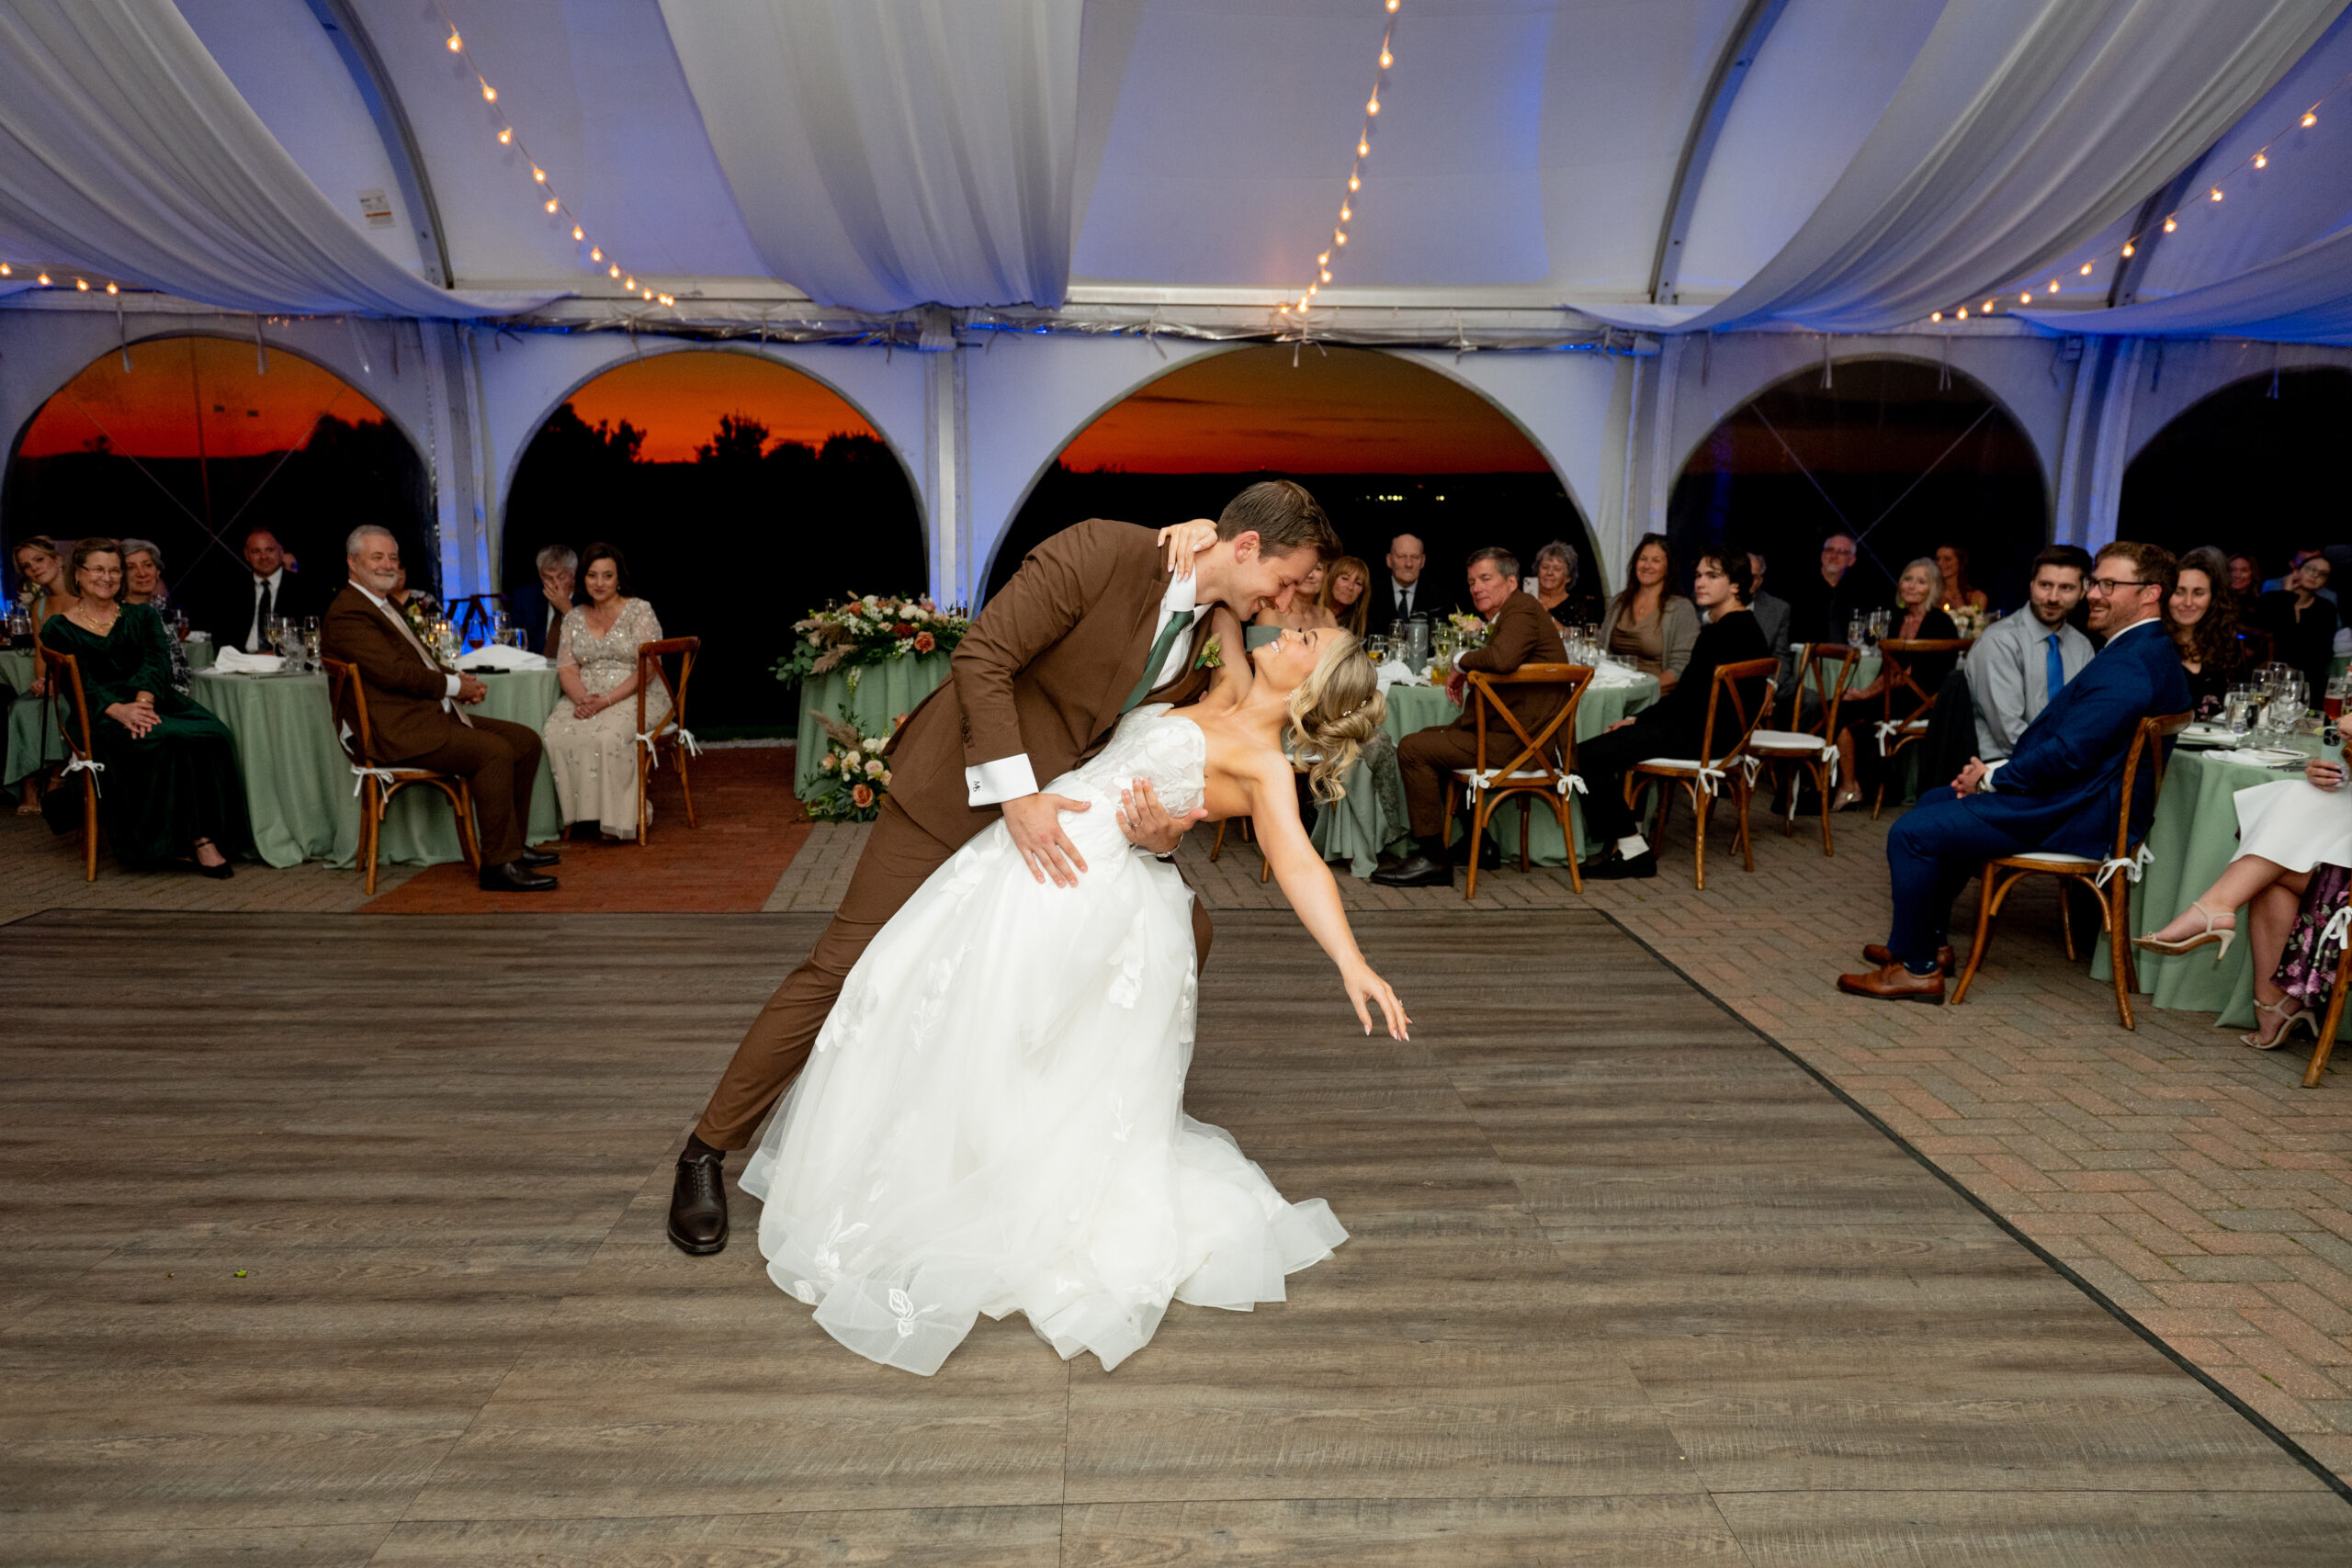
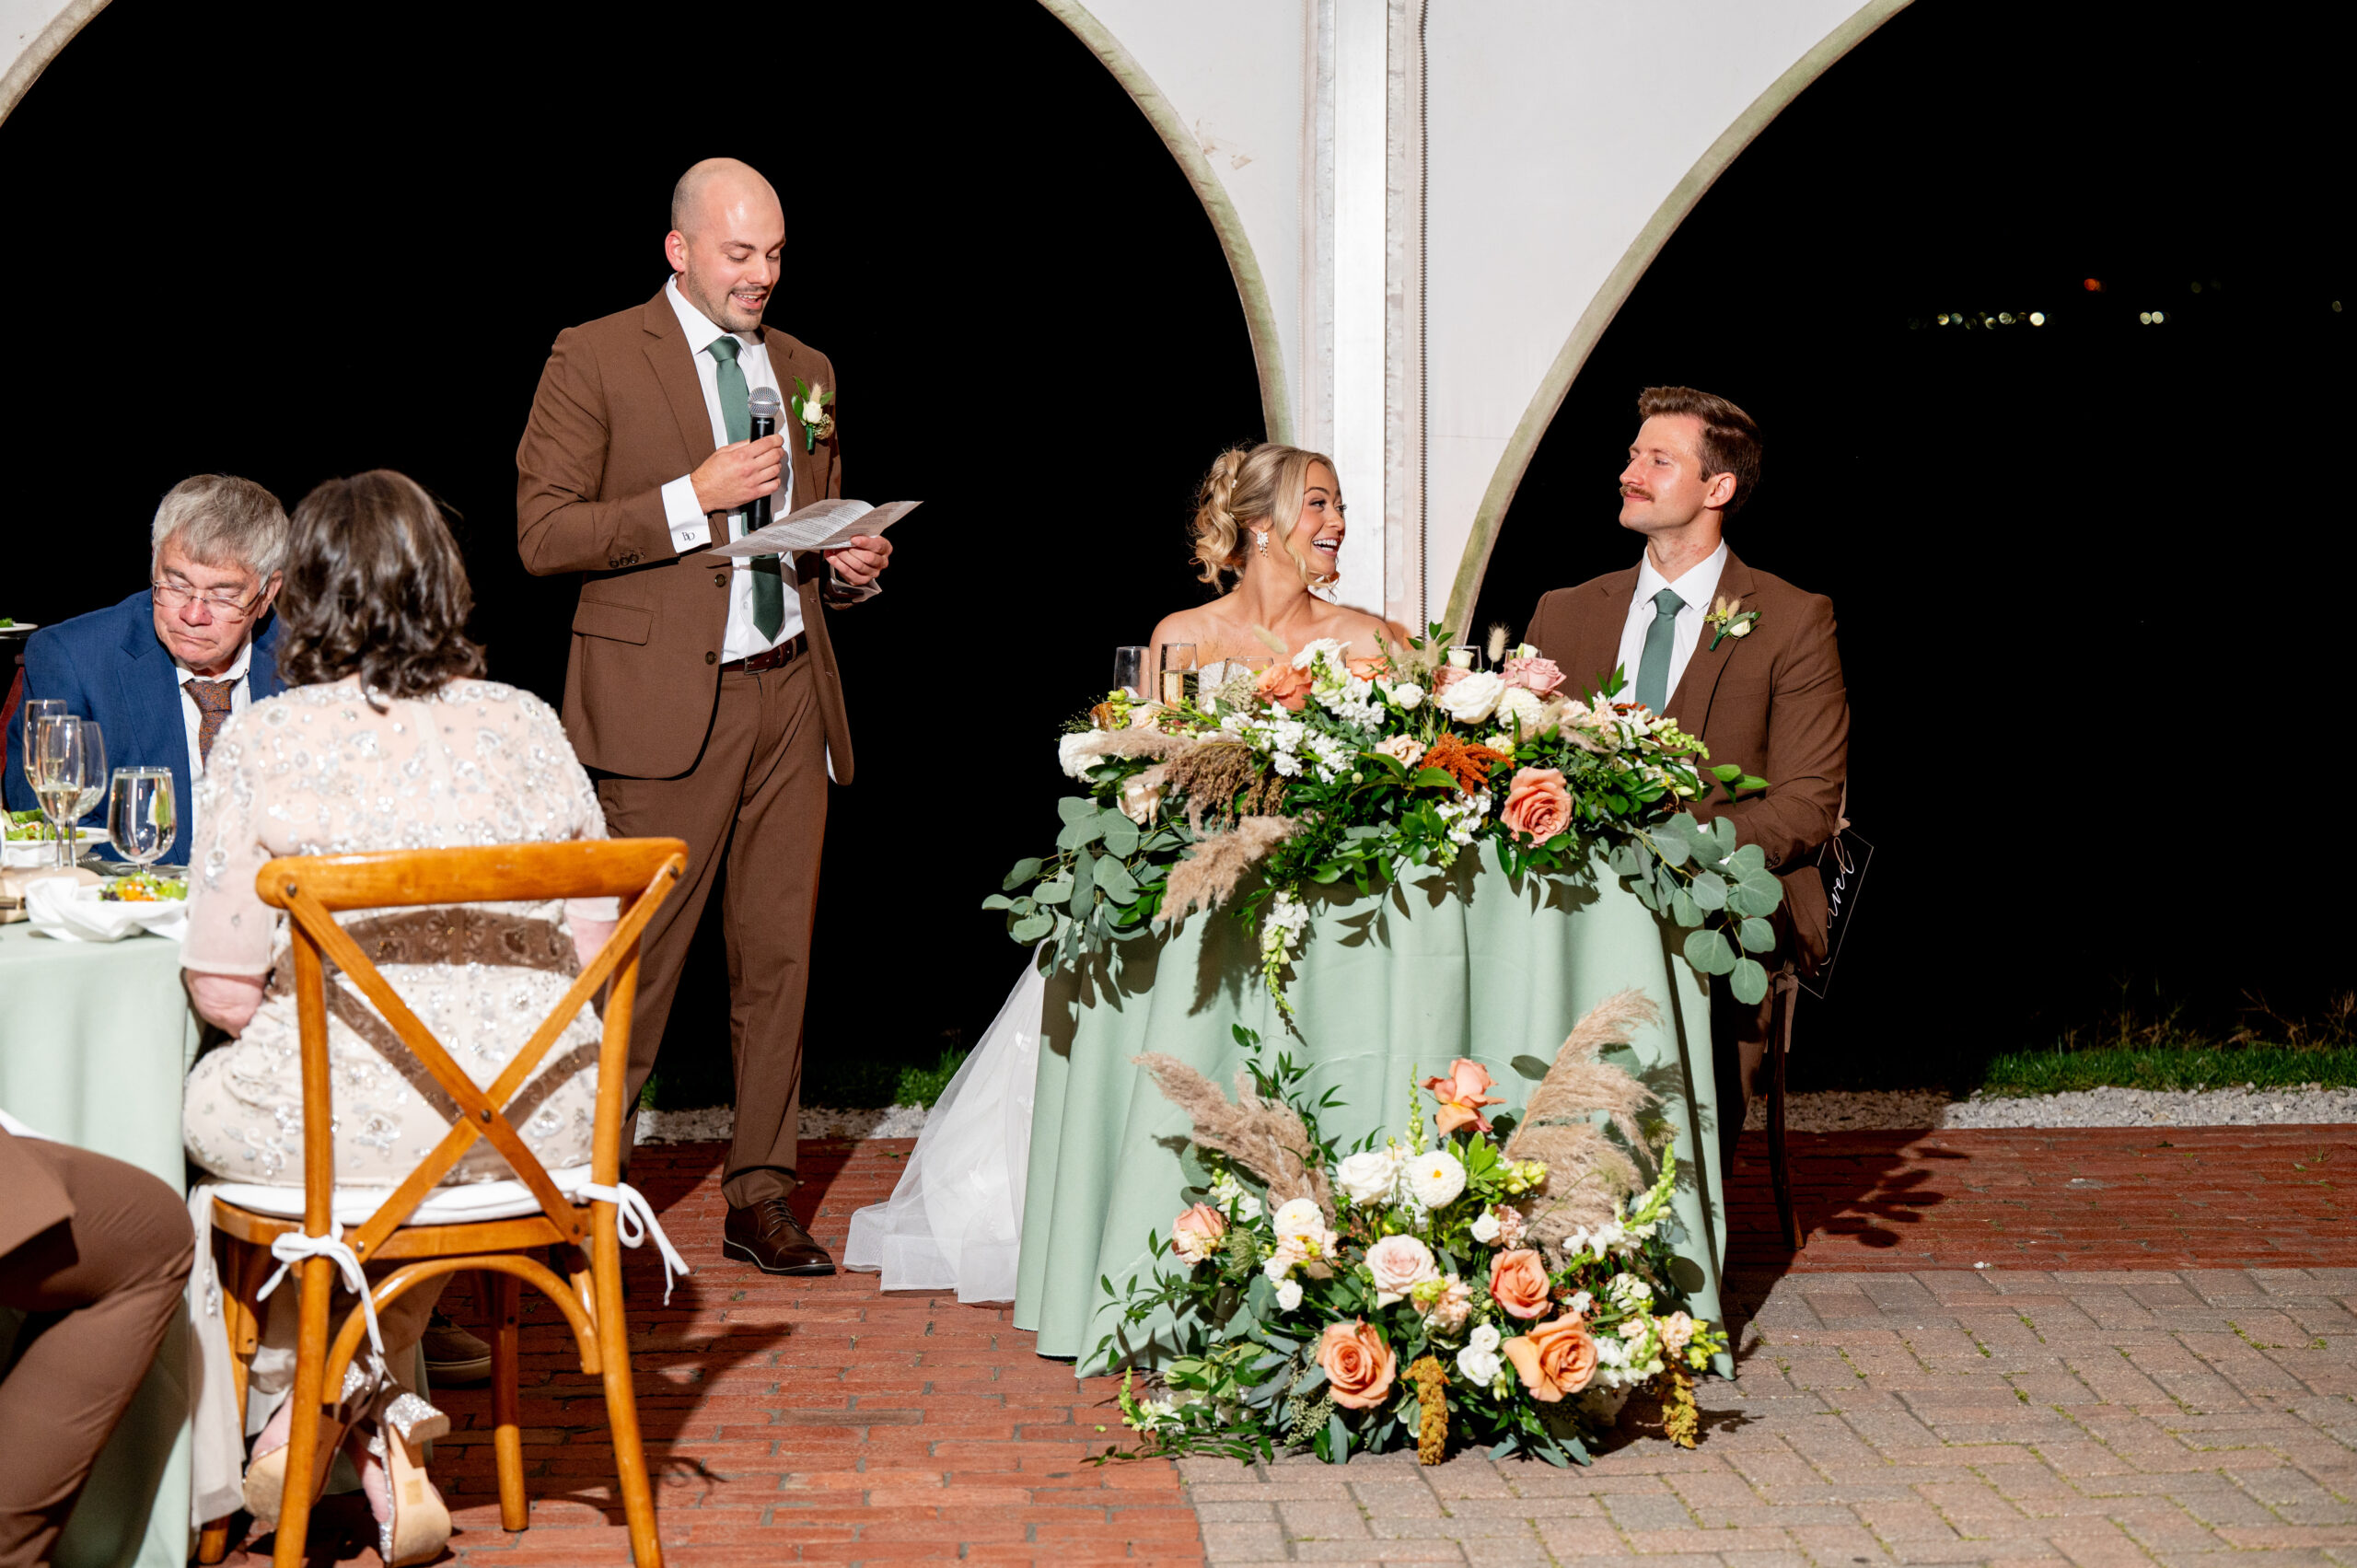
If you’re having a sweetheart or head table, make sure your parents and VIPs are seated as close as possible to you — and on the side that faces your table directly. This ensures they can see your faces during special moments like toasts, and more importantly, helps your photographer capture their reactions.
Yes, they can turn their chairs — and they will! — but if someone is seated in between them and you, that guest’s head could block the view in photos. A small detail, but one that can make a big difference in your final gallery.
Part 2: Want even more control? Assign actual seats (not just tables) for your VIPs. That way, you can make sure the right people are facing the sweetheart table, have a clear line of sight, or are seated where they’ll feel most comfortable.
2. Create the First Draft With Just You and Your Partner
One of the biggest seating chart mistakes couples make? Asking for too much input too soon. Everyone has opinions — and with so many moving parts (especially in large or blended families), it can quickly spiral.
Sit down with your partner and build the first draft together. Once it feels good to both of you, check in with your parents — especially if they’re contributing financially or know of any sensitive family dynamics. Let them approve the final plan, but keep the initial decision-making simple and centered around what matters most to you two.
3. Decide Early: Sweetheart Table or Head Table?
This one choice influences everything else. A sweetheart table gives the two of you space (and some quiet moments together), while a head table allows you to sit with your wedding party.
Whatever you choose, make the decision early. It will guide your layout, your table count, and who gets placed where — especially when it comes to keeping VIPs close.

4. Get the Floor Plan from Your Venue or Planner
Before you dive into your chart, talk with your venue coordinator or wedding planner. They’ll provide you with the actual layout of your reception space — including how many tables will fit, where the dance floor or DJ will be, and any layout restrictions like pillars or walkways.
Seeing it all visually makes a huge difference and helps you avoid needing to redo everything halfway through planning.
💡 Not a fan of paper and pen? My Best Day Ever Wedding Planner includes a fully customizable seating chart tool that lets you move guests from table to table without scribbles or starting over. You can test different options and share your final version with your planner and vendor team with ease!

5. Seating Chart Etiquette 101
This is the part where things can get a little tricky — but with some thought and sensitivity, you can avoid most of the awkward moments. Here are a few etiquette guidelines to help:
-
Don’t split up couples.
This might sound like an obvious one, but in the shuffle of table counts and seating needs, it sometimes happens. Even if one partner doesn’t know anyone else at the table, they’ll feel way more comfortable sitting next to their plus-one. -
Seat singles with intention (but skip the matchmaking).
Try to seat single guests with people they’ll vibe with — like mutual friends or guests around the same age — but avoid creating an obvious “singles table.” You want them to feel included, not spotlighted. -
Group guests by connection — and by energy.
Think beyond just categories like “college friends” or “cousins.” Consider their personalities, too. Would these people enjoy sitting together? Do they have shared interests or a similar vibe? Try to seat people together who will actually want to chat and connect — it makes dinner way more fun for everyone. -
Navigating divorced or blended parents? Make it clear, comfortable, and respectful.
If your parents are divorced and don’t get along (or just feel awkward around each other), seat them at separate tables of equal importance — ideally both close to you. You don’t need to explain every choice, but do give your planner or day-of coordinator a heads-up so they can make sure everything goes smoothly for you. -
Check in with your parents for final approval.
You and your partner should always create the first draft together, but before locking anything in, it’s worth asking your parents to look it over. Especially if they’re helping host or know about any behind-the-scenes family dynamics, their insight can help you avoid small issues turning into day-of drama.
6. Skip the Seating Chart (If It Works for Your Style)
For smaller, backyard, or more relaxed weddings, you can skip the stress of making a full seating chart altogether. Still reserve tables for parents or grandparents, if you like, but let the rest be open seating.
Want to keep it light? Use a fun sign like:
🪧 “Find a seat, make a friend — then keep those feet moving on the dance floor!”
It sets a joyful tone and keeps things stress-free.

Bonus Tip: Keep Centerpieces Low at VIP Tables
Tall floral centerpieces or decor are beautiful — but at VIP tables (especially parents’ tables), they can block faces and create awkward shadows in your photos. Choose low or minimal arrangements for those key tables so your photographer has a clear view and your loved ones don’t feel hidden.
Your seating plan doesn’t need to be perfect — just thoughtful. Keep your priorities (and your people) at the center, and don’t be afraid to simplify where you can. Whether you’re assigning every seat or going with a looser layout, you’ll be so glad you planned ahead. And your wedding photographer will thank you, too!